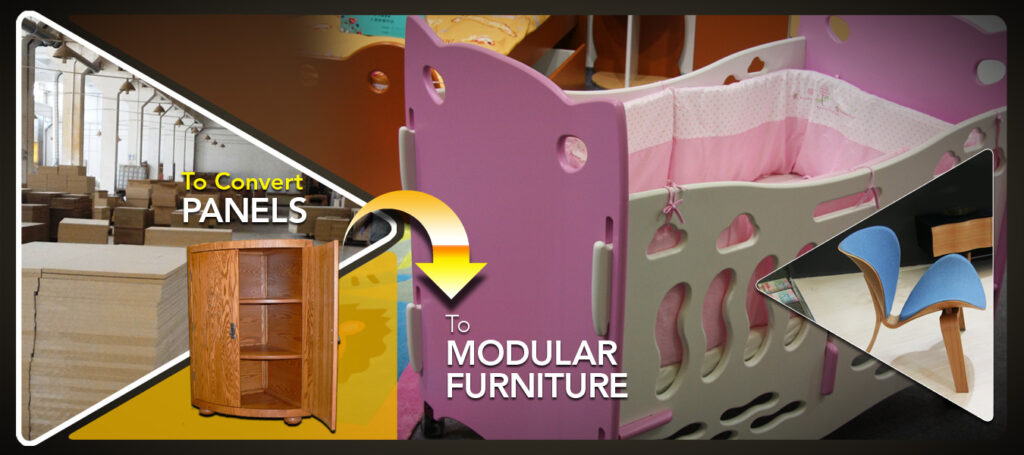
Many of the Interior design firms are making Modular furniture as per their designs and they are always in lookout how they can make it fast, uniform and good finish with low investment. They do not want to invest more as they are not mass producers but their requirements are few sets per project. Few of them also need to make the furniture on little larger scale as their projects are of larger area spreading on few thousand sq. meters. Hence I have decided to write a series of articles for each of the segments depending on quantity and flexibility. The series of articles will cover making of “Modular Furniture from Nano scale to industrial scale”. I will strive to present these articles which should serve as a practical guide to small, medium and large scale manufacturers.
Making of Modular Furniture on Nano Scale for small batch production
We observe that manufacturing Modular furniture is a time consuming process unless some equipment are used in the making process. Sturdiness and stability are the main problems faced in hand made modular furniture. Carpenters have tried to use the same methods of making that they have used in manufacturing Furniture using Plywood while making MDF / Chipboard Furniture. Important point to note – Plywood and Chipboard /MDF are two different materials with different properties, advantages, limitations etc.
Strength and stability are the main criteria on which the Modular Furniture made across Indiain MDF/ Chipboard fails in many cases. It is often believed by architects & interior designers that MDF is sawdust (Bhuse ka board) board furniture that MDF furniture has no strength and so they feel that Ply wood furniture is the best one. But this is totally misleading belief. The main fault in Modular Furniture made across India by small producers starts from wrong choice of material and further lies in
- Inappropriate use of manufacturing process,
- Lack of precision
- Selection of right hardware.
Entire world is using Chip Board / MDF as main raw material for Modular Furniture and India is the only country where use of plywood in furniture making is promoted that is why we see the advertisements telling that the kitchen is made from Marine Plywood.
MDF/Chipboard is the stable, balanced and smooth surface material available in various grades including waterproof, water resistant and fire resistant, hollow core etc.
It should be understood that the Plywood can be screwed- nailed on edges where as it is not possible in case of MDF / Chipboard. But there are different and better ways to use Chipboard / MDF whereas you can manufacture a nail- free furniture. You should bear in mind that the use of Chipboard / MDF in on rise across the Globe and the use of Plywood in Furniture making is on diminishing. Leading furniture manufacturers across the Globe have understood the advantages of Chipboard / MDF material and shifted to using it in their products and adapted suitable manufacturing process. The process of manufacturing is different for each of the material like MDF, Chipboard, Hollow core board etc.
Wrong methods used in making modular furniture with Particle board and MDF is the main reason for defects in Modular furniture made in India.
In this article we will consider Making of Modular Furniture on Nano Scale for small batch production. This setup will need an investment that can range from Rs. 2 lakh to 5 Rs. lakh depending on the equipment you choose. In the market portable equipment are available in hobby grade and industrial grade. The hobby grade if used for longer working hours with heavy load conditions then the motor will burn. Hence we see many users have couple of burned equipment in their factory. Hobble equipment are cheaper hence they are used for Industrial use that is causing the work stoppage. For this reason selection of Industrial scale equipments is suggested for uninterrupted work.
The main operations in making of modular furniture are namely Panel cutting, edge banding and boring.

The economic solution for Pre laminated board cutting is Portable saw with scoring and Guide rail. The scoring blade will assure chip free cutting from bottom side and the guiding rail will guarantee straight cutting of the board. One should take precautions that accurate mounting of the guiding rail is done so that no rework is needed. Track saws are available from many Portable tool manufacturers and can be easily searched on Internet. Tracks are available in various lengths suitable to every application. The quality of the track plays a vital role in the quality of the cut. The track is made from hardened and ground aluminum alloy. Some companies provide silicon linear bearings to avoid friction and impart longer life to the track rail.
Brush less portable tools like saws, saw with scoring, routers and drills – drivers are available. They are bit costly but long lasting. They are free from the fear of armature burning.

In case of round table tops or oval shaped table tops one has to use a portable router with circle / oval cutting jig as showed in the above picture. One should use Melamine faced Chip Board / MDF instead of solid wood as shown in the above picture. This jig is universal for both MDF & solid wood.
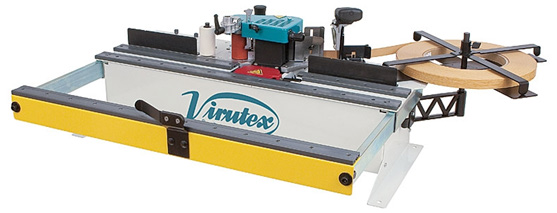
The accurately sized component is ready for edge banding. The economic solution for edge banding is the use of Portable edge bander. The edge bander can be either hand held or mounted on table that makes the working easy. The machine is supplied with accessories like trimmers and end cutters for smoother finish.

The edge bander is using hot melt glue adhesive to bond the edges with board. The machine has a temperature controller. One should set the temperature properly as per glue specifications. Do not keep higher temperature that will result in weaker bonding. Accurate temperature gives longer life to the glue. Frequent heating and cooling of the glue also reduces the bonding strength of the glue. The edge banding tape has to be pre cut to the required length. The machine does not have cutting device.
Enough pressure has to be applied on the tape to assure good bonding and thin glue line. If proper pressure is not applied then one will see a thick glue line which will have weaker bonding causing pealing of the edge banding tape. Normally the edge banding tape is 3 to 4 mm wider than the thickness of the board. The excess material is trimmed off after edge banding.
In winter season the PVC tapes tend to become hard. In case of 3 mm thick tapes many times it becomes very difficult to bend it to edge band. One has to pre heat the tape with hot air blower or hair drier to make it flexible – soft.

The excess tape is removed by using trimmers with copying device. The tool is set properly so that the edges become smooth. Profile cutters are used to give round edges as per the thickness of the edge. Proper re-sharpening assures smooth finish.
One can also do the edge banding with matching HPL strips. Trimming is done is the same manner as tapes using electric trimmer.
In case of thinner edge bands one can trim the excess material with sharp knife.
Special holders are available to clamp the knives for easy and safe working.
One should replace the knives once these become blunt or when the trimming finish starts to become rough and not very smooth. This is very important to get high quality finished product. The above – mentioned trimmers can be used for edges up to 1 mm thick edges. Special tools are available for thicker edges.


After proper edge banding one needs to drill holes to accommodate the hardware and dowels etc. For small batch work it is suggested to have drilling jigs shown in the picture. There are many companies like Kreg Tool Co, General tools, True position Drill Guide etc.
These jigs can be used to drill holes for hinges, drawer slides, handles, shelf supports, dowels, KD fittings etc.

The above jig can also be used for lin
e drilling for shelf support.
One can use KREG drilling jig for the cabinet joinery with screws only. The structure becomes very strong after joining all the components together.
While drilling holes on side panels one should remember that screwing should be done on the flat surface of the panel and not on the THICKNESS. There are special screws used for Chipboard / MDF furniture/ solid wood etc. Proper selection of the screw is done as per the guidance of the supplier. Step drill is used to impart strong joint of components. Proper length of the screw is selected depending upon the thickness of the panel.


The Kreg jigs can be used for solid wood picture / mirror frames but not MDF / Chipboard frames.
With above mentioned set of only few portable machines one can produce high quality modular furniture for any use like office furniture, bed room furniture , Kitchen units etc.
For any information or guidance contact:
shanti@woodconconsultants.com
Visit us at:
www.woodconconsultants.com